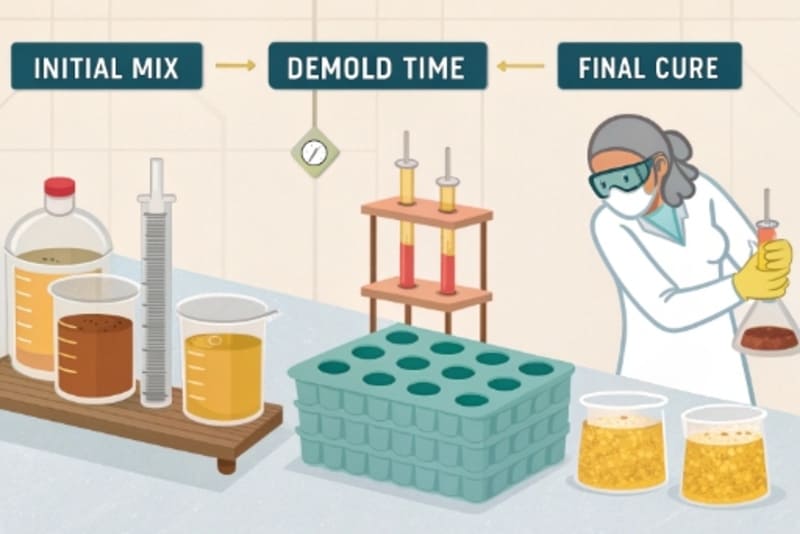
Your urethane mold isn't reaching its target hardness, and you're worried. This problem can ruin your concrete castings and waste materials. Understanding the curing process is the key to fixing it.
The main reason for changes in mold hardness1 is incomplete curing2. Urethane rubber requires several days to fully cross-link3 and achieve its final, stable hardness. Testing the mold's hardness too soon after demolding will give you an inaccurate, softer reading. Mixing ratio and temperature4 also play huge roles.
<sup id=](https://urethanemoldrubber.com/wp-content/uploads/why-does-my-urethane-rubber-mold-hardness-change-w.jpg)
I thought a urethane mold was ready for use as soon as it cured enough to be demolded. I held this belief for a long time. Then, a client in the Philippines taught me a valuable lesson. They had ordered a custom, super-hard 93 Shore A polyurethane rubber6. Suddenly, they contacted us saying the entire batch of Part B was unusable because its viscosity7 was extremely high. We immediately shipped a replacement. The viscosity problem was solved, but a new one appeared: the hardness was too low. They tested it and got only 40-45 Shore A, a huge drop from the 93 Shore A standard. This experience forced me to look deeper into the factors that control the final hardness of a urethane mold, and it all starts with the curing process.
Is Your Urethane Rubber Not Curing Hard Enough Right After Mixing?
You mixed the urethane parts perfectly, but after a few hours, it still feels soft. You start to worry that the entire batch is bad. The solution is often just patience.
Urethane rubber hardness develops over time. The "demold time8" listed on the technical sheet is not the "full cure time9." The hardness you measure right after demolding is temporary. Your mold will only reach its final Shore hardness10 after several days of proper curing.
When I was troubleshooting the issue with my Filipino client, the first question our technical team asked was, "When did they test the hardness?" This is the most common point of confusion. Many people, including me at one point, assume that once you can take the rubber out of the master model, it's done. But that's not the case. The chemical reaction11 is still happening.
Demold Time vs. Full Cure Time
Think of it like baking bread. You can take the loaf out of the oven when it has a solid crust, which is like the demold time8. But if you cut into it immediately, it's still steamy and gummy inside. You need to let it cool and set for its final texture, which is like the full cure time. For urethane rubber, demold time might be 12-24 hours, but the full cure time to reach final physical properties is usually 5 to 7 days.
The Curing Curve Explained
Hardness doesn't just appear; it builds up gradually. A urethane rubber designed to be 90A might only be 60A or 70A at the demold stage. Over the next few days, it will continue to harden until it reaches its specified value. Testing it on day one will always give you a lower number.
Here's a simple breakdown of what to expect with a typical 90A urethane rubber:
| Time After Mixing | Expected Shore A Hardness (Example) | Status |
|---|---|---|
| 12 Hours | 60-70A | Ready to demold, still soft and flexible |
| 24 Hours | 80-85A | Gaining significant strength and hardness |
| 3 Days | 88-90A | Very close to its final properties |
| 7 Days | 90A+ | Fully cured and stable for production use |
Patience is truly the most important tool here.
Could Your Mixing Ratio and Temperature Be Ruining Your Mold's Hardness?
You believe you followed the instructions perfectly, but your mold has hard and soft spots12. You feel frustrated by the inconsistent results. Find out how simple process mistakes can cause this.
An incorrect mix ratio is a primary cause of soft cures. If you have too much of Part A or Part B, the chemical reaction11 is incomplete. Temperature is also vital. Curing in a cold environment slows the reaction, resulting in a softer material for a much longer time.
<sup id=](https://urethanemoldrubber.com/wp-content/uploads/could-your-mixing-ratio-and-tem.jpg)
After checking the curing time with my client, my next questions were about their process. "What was your mix ratio, and what is the temperature in your workshop?" These two factors are the foundation of a successful urethane mold. If they are wrong, nothing else matters. You can wait for weeks, but the material will never reach its intended hardness if the chemistry is off from the start. It’s like trying to build a house on sand.
Why the 1:1 Ratio Is Critical
Most of our polyurethane rubbers use a simple 1:1 mix ratio by weight. This isn't just a suggestion; it's a precise chemical formula. Part A and Part B contain specific molecules that need to link up in a perfect balance to create a strong, stable polymer chain. If you add too much of one part, there won't be enough of the other part to react with. Those unreacted molecules will remain liquid within the rubber, creating a soft, oily, or weak mold. Always use a digital scale for accurate measurements.
The Impact of Temperature
Urethane rubber is sensitive to temperature. The ideal curing environment is around 25°C (77°F). If your workshop is too cold, the chemical reaction11 will slow down dramatically. This means it will take much longer to harden, and in very cold conditions, it might never fully cure at all. This was another potential issue for my client. We had to confirm their working conditions to rule it out.
Here is how temperature affects curing:
| Temperature Range | Curing Speed | Potential Issue with Hardness |
|---|---|---|
| Below 15°C (60°F) | Very Slow | Cure may stall, preventing it from ever reaching full hardness. |
| 20-25°C (68-77°F) | Ideal | Reaches specified hardness within the standard 7-day cure time. |
| Above 30°C (86°F) | Very Fast | Cures quickly, but can reduce working time and trap air bubbles. |
Always try to work in a temperature-controlled space for the most reliable results.
How Do You Properly Test the Hardness of a Urethane Mold?
You think your mold is too soft, but are you really sure? Testing the hardness incorrectly is easy to do and will give you misleading results, causing unnecessary worry and wasted materials.
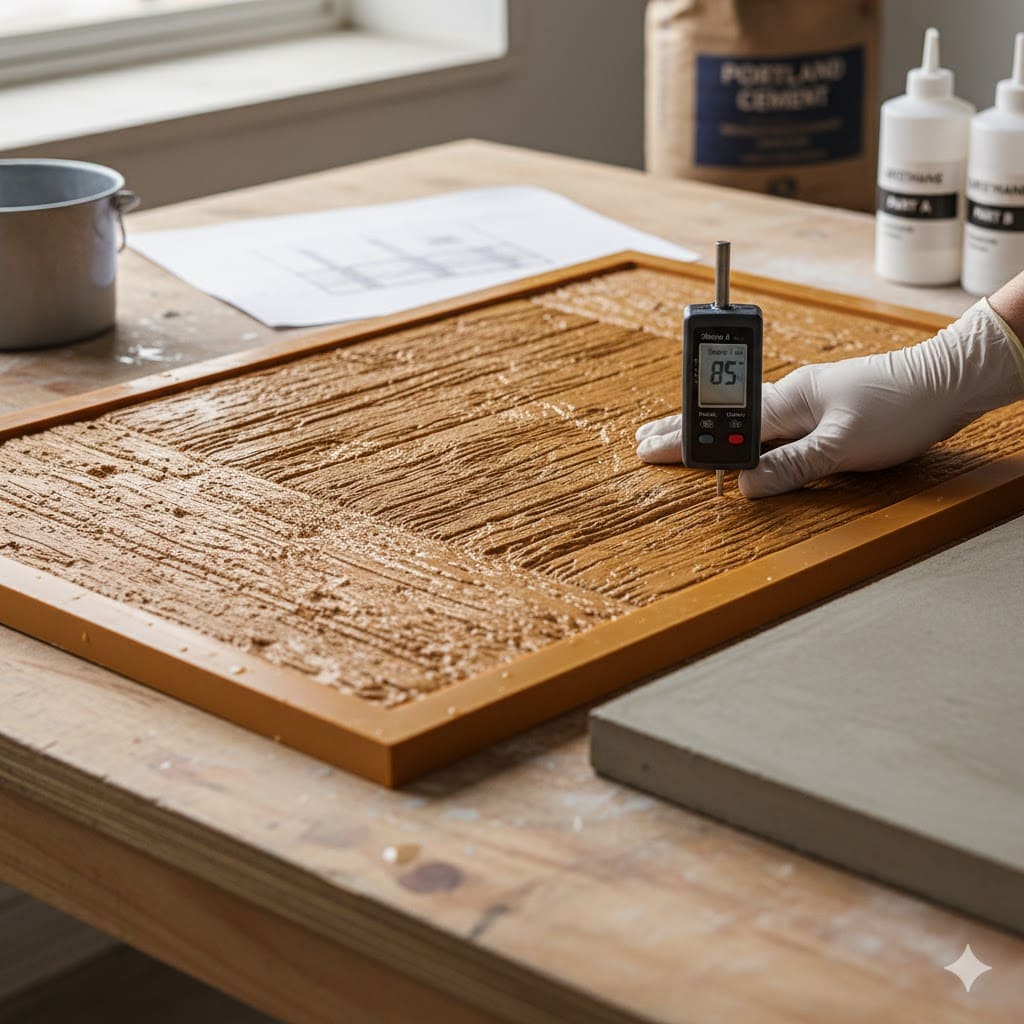
To test hardness correctly, you must wait for the full cure time9, which is typically 5-7 days. Use a calibrated Shore Durometer14 on a flat, thick part of the rubber (at least 6mm or 1/4 inch). Press firmly and take an instant reading. Always take multiple readings.
The final piece of the puzzle with my client was how they were testing the hardness. Simply poking the mold with a fingernail is not a reliable test. To get an accurate number that you can compare to a technical data sheet, you need the right tool and the right technique. An incorrect measurement can make you think a perfectly good mold is a failure. This final step is crucial for quality control15 and ensuring your mold will perform as expected when you start casting concrete16.
The Right Tool for the Job
You need a tool called a Shore Durometer. There are different scales, but for mold-making rubbers like polyurethane, you'll almost always use the Shore A scale. Make sure your durometer is calibrated and in good working condition. It has a small pin that you press into the rubber, and the resistance it meets is translated into a hardness number on the dial.
Step-by-Step Testing Guide
Follow these steps for an accurate reading:
- Wait for a Full Cure: Do not test before the material has cured for at least 7 days at room temperature. This is the most important rule.
- Find a Good Spot: Choose a section of the mold that is completely flat and has a thickness of at least 6mm (1/4 inch). If the rubber is too thin, the surface underneath will affect your reading.
- Press Firmly and Flat: Place the durometer flat against the surface. Press down firmly and smoothly until the base of the tool is flush with the rubber. Don't "jab" it.
- Read Immediately: The reading you want is the one that appears the instant the durometer base is flat against the surface. If you wait, the reading may drop slightly.
- Take Multiple Readings: Take at least 3-5 readings in different spots on the mold and calculate the average. This gives you a much more reliable result than a single test.
By following this process, we confirmed with our client that their initial low readings were because they were testing far too early in the curing process. Once they waited the full 7 days, the hardness was right where it needed to be.
Conclusion
To get the right hardness in your urethane mold, remember three things: wait for the full 7-day cure, mix your parts accurately, and control your workshop temperature17.
Learn about the methods and tools used to accurately measure mold hardness for quality assurance. ↩
Understand the factors leading to incomplete curing and how to avoid them for better mold quality. ↩
Discover the importance of cross-linking in achieving the desired properties of urethane rubber. ↩
Learn about the ideal temperature conditions for curing urethane rubber effectively. ↩
Explore the versatility of urethane rubber and its various applications in mold-making and other industries. ↩
Learn about the advantages of polyurethane rubber in mold-making applications. ↩
Explore the role of viscosity in the processing and final properties of urethane rubber. ↩
Understand the significance of demold time and how it differs from full cure time. ↩
Understand the timeline for achieving full cure in urethane rubber and its importance. ↩
Explore the concept of Shore hardness and its relevance in evaluating rubber materials. ↩
Delve into the chemistry behind urethane rubber curing and its impact on hardness. ↩
Learn about the common issues that lead to inconsistencies in mold hardness. ↩
Find out how the correct mixing ratio affects the final properties of urethane rubber molds. ↩
Get insights on using a Shore Durometer correctly for accurate hardness testing. ↩
Discover effective quality control measures to ensure the reliability of your molds. ↩
Find out how to achieve the best results when casting concrete using urethane molds. ↩
Get tips on controlling workshop temperature for optimal curing of urethane molds. ↩
